Tips, Tricks, & Recipes for Making, Decorating, & Storing Royal Icing Embellished Cookies
Decorated cookies are the perfect dessert for any celebration or holiday. Acting as canvases of creativity, cookies can be adorned with any event's colors, phrases, or symbols. In this blog, we’ll cover the basics of decorating cookies with royal icing, pointers for piping technique, and ideas for finishing touches. Whether you fancy simple designs or intricate works of art, anyone can learn how to decorate cookies like a professional. With just a few simple tips and tricks, you’ll be able to express in inner artist and impress guests everywhere. Ready to begin? Then, let’s dive into the world of cookie decorating!

The Basics of Royal Icing
The best icing for creating intricate designs and decorations on cookies is royal icing. Versatile and widely used in baking and cake decorating, it's prized for its smooth texture, glossy finish, and ability to harden to a firm consistency.
The term "royal icing" is believed to have originated in England and became popular in the Victorian era, where it was traditionally used to decorate elaborate cakes and desserts for royal occasions and special events. While the exact origin of the name is not definitively documented, it's thought that the term "royal" was used to signify the prestigious nature of the icing and its association with high-profile events and celebrations attended by royalty.
The primary ingredients in royal icing are powdered sugar, also known as confectioner’s sugar or icing sugar, and egg whites. For food safety reasons, alternative royal icing recipes have been created using meringue powder, thus reducing the need to use egg whites. Comprised of powdered egg whites, sugar, artificial vanilla flavors, and various stabilizers such as corn starch, gum arabic, and cream of tartar, meringue powder royal icing recipes do not qualify as vegetarian or vegan. Vegan royal icing can be created instead using aquafaba, the viscous liquid drained from a can of chickpeas. A versatile egg substitute, aquafaba mimics the properties of egg whites when whipped and, as such, has gained popularity in vegan baking. We’ll cover how to make both recipes a bit later.
The 3 Parts of Decorating Cookies with Royal Icing
Before we jump right into the recipe, we need to briefly explain the 3-step process for decorating cookies with royal icing: outlining, flooding, and detailing. Outlining involves using thicker royal icing to create borders or shapes on your cookie, while flooding means using thinner icing to fill or “flood” the bordered areas. The only difference between the icing used for outline and the icing used for flooding is the amount of liquid added to each mixture to give it a different consistency. Lastly, detailing is anything that accents your cookie, like additional piping or sprinkles.

Classic Royal Icing
Achieving the perfect consistency of royal icing can be challenging, as it needs to be thin enough to flow smoothly for flooding but thick enough to hold its shape for piping intricate designs. It often requires careful adjustment of the icing's thickness by adding small amounts of liquid or powdered sugar. When making your own royal icing, remember there are no mistakes, just opportunities to learn!
Prep Time: 10-15 minutes
INGREDIENTS
¼ cup meringue powder or powdered egg whites½ cup lukewarm water
4 cups (1 lb) confectioner’s sugar
1 tsp flavored extract of your choosing (optional)
gel food coloring (optional)
STEP 1: In a large mixing bowl, add confectioner’s sugar and meringue powder. Stir to combine.
STEP 2: Using a handheld mixer or stand mixer fitted with a whisk attachment, combine powdered mixture with extract and water on medium-low speed. Do not add all the water in at once, but instead slowly add in the water until the icing is the consistency of soft cream cheese. This may take between 4-5 minutes.
STEP 3: If tinting icing, divide the mixture into separate mixing bowls. In each bowl, add a couple of drops of gel food coloring and combine. Remember, it’s always easier to make your icing more vibrant than less, so start with less, and you can always add more.
Pro Bakers Tip: Make lighter icing colors first before making darker color icing. Darker color icings can be created by adding more food coloring to a lighter mixture. This will save you from having to make multiple batches of icing. For example, make light pink icing before making hot pink. Simply separate and set aside a portion of each icing color as you go.
STEP 4: Once satisfied with the icing color, divide each color between two bowls. One bowl will stay at its current consistency and be used as piping icing. The second will become flood icing. To make flood icing, add ½ tsp of water at a time to the second bowl and mix thoroughly till the icing has reached the consistency of thick honey. If the mixture becomes too thin, add powdered sugar till the icing has rethickened.

Vegan Royal Icing
Vegan royal icing may have a slightly different texture and consistency compared to traditional royal icing. Because of its key ingredient, aquafaba, vegan royal icing can vary in consistency depending on the brand and the batch of chickpeas used. This may affect the final texture of the icing. But not to fear! The only thing between you and great vegan royal icing is trial and error. Try this recipe on for size and see how it fares.
Prep Time: 10-15 minutes
INGREDIENTS
4 cups confectioner’s sugar4-6 tbsp aquafaba
1 tsp flavored extract of your choosing (optional)
gel food coloring (optional)
STEP 1: In a large mixing bowl, add confectioner’s sugar, 4 tbsp of aquafaba, and flavored extract if desired.
STEP 2: Using a handheld mixer or stand mixer fitted with a whisk attachment, whisk combined ingredients on medium-low speed until the icing becomes smooth and forms stiff peaks. This may take between 5-7 minutes. If the icing is too thick, add 1 tsp at a time of reserved aquafaba until the icing reaches the consistency of soft cream cheese.
STEP 3: If tinting icing, divide the mixture into separate mixing bowls. In each bowl, add a couple of drops of gel food coloring and combine. Remember, it’s always easier to make your icing more vibrant than less, so start with less, and you can always add more.
STEP 4: Once satisfied with the icing color, divide each color between two bowls. One bowl will stay at its current consistency and be used as piping icing. The second will become flood icing. To make flood icing, add ½ tsp of water at a time to the second bowl and mix thoroughly till the icing has reached the consistency of thick honey. If the mixture becomes too thin, add powdered sugar till the icing has rethickened.

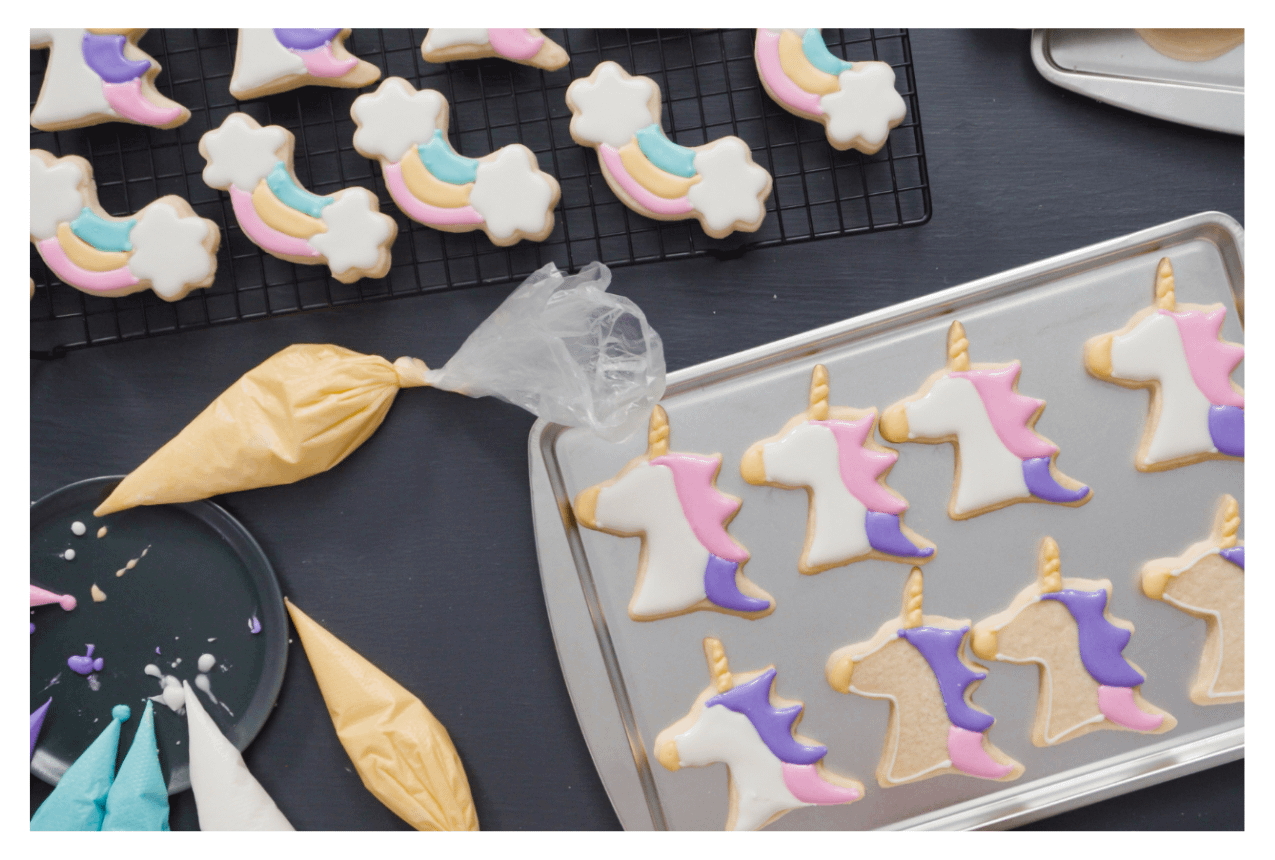
How to Pipe Royal Icing Onto Cookies
Now that you have your icing, it’s time to begin piping. Simply follow the steps below, and you should be good to go!
STEP 1 - Prepare your piping bag: Fit two piping bags with decorating tips—for your piping bag, we recommend Wilton’s round #4 decorating tip; for your flooding bag, we recommend Wilton’s round #10 or #12 tip. Fill each piping bag with its corresponding royal icing.
STEP 2 - Outline the cookies: Using your #4 piping bag filled with the thicker of the two icings, outline the edges of each cookie. Take your time to apply even pressure to create clean, consistent lines.
STEP 3 - Flood the cookies: Once you've successfully outlined each cookie, switch to your #10 or #12 piping bag containing the thinner of the two icings and fill in the outlined areas. If needed, use a small offset spatula or the back of a spoon to spread the icing evenly to the edges of the outline. You can also gently shake the cookie to encourage the icing to settle.
Pro Baker’s Tip: If any air bubbles appear in your flood icing, use a toothpick to burst the bubbles and smooth the icing’s surface.
STEP 4 - Let the icing dry: Depending on the humidity and thickness of the icing, this may take several hours to overnight. To speed up the drying process, you can place the cookies in front of a fan or in a cool, dry area.

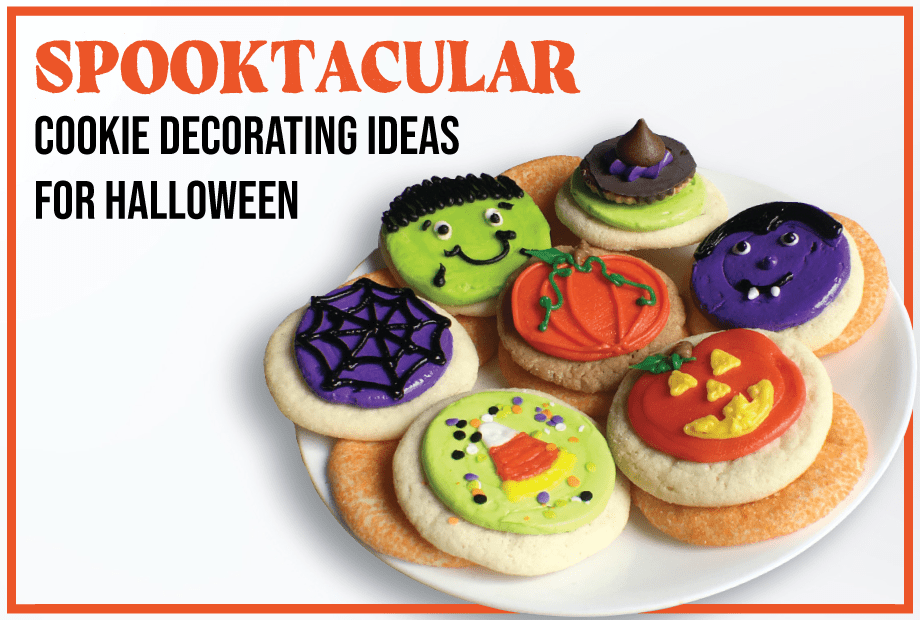
Embellishing Iced Cookies
Once you've iced your cookies, it's time for the finishing touches by adding texture and dimension. Experiment with different techniques and decorations to add visual interest and depth to your designs. Here are a few ideas to get you started:
- Edible Sprinkles, Glitter, or Pearls: Available in a variety of shapes, sizes, and colors, these details can be scattered artistically or intricately placed to create eye-catching designs, shapes, or words.
- Stenciling: Stencils are a fun and easy way to add intrigue. Place a stencil over your cookie and use a sifter or a brush to dust powdered sugar, cocoa powder, or luster dust onto the surface. Carefully remove the stencil to reveal your design.
- Royal Icing Transfers: Create or purchase custom royal icing transfers by piping designs onto parchment paper and allowing them to dry completely. Once dry, carefully peel them off and attach them to your cookies with a dab of fresh icing.
- Wafer Paper Transfers: Order custom decorations using wafer paper. Stiffer than frosting sheets and made of slightly translucent paper, these transfers can be printed using food-grade edible ink cartridges and then placed atop iced cookies.

How to Store Iced Cookies
Proper storage of cookies decorated with royal icing is essential in maintaining their freshness, preserving their decorative designs, and ensuring they remain in optimal condition for gifting or later enjoyment. First, check to see if the royal icing on the cookies has dried completely before storing them. This typically takes several hours or overnight, depending on the thickness of the icing and the humidity of your environment. The icing should feel firm to the touch and not smudge when gently pressed.
Store the cookies in a single layer in an airtight container. Choose a container that is large enough to accommodate the cookies without crowding them. This prevents the decorated surfaces from coming into contact with each other, which can cause smudging or damage to the designs. If you need to stack the cookies in multiple layers, place a sheet of parchment paper or wax paper between each layer to provide a protective barrier. This helps prevent the cookies from sticking together and preserves the integrity of the decorations.
Keep the airtight container of cookies in a cool, dry place away from direct sunlight and heat sources. Exposure to moisture can cause the royal icing to soften or dissolve, leading to loss of decoration and overall quality of the cookies. While royal icing cookies can be stored at room temperature, refrigeration can help extend their shelf life, especially in warmer climates or during humid conditions.
If you choose to refrigerate the cookies, make sure they are stored in an airtight container to prevent them from absorbing odors from other foods in the refrigerator. While technically, royal icing cookies can be frozen, it's not recommended as freezing can alter the texture and appearance of the icing. Additionally, the moisture produced from thawing frozen cookies decorated with royal icing can cause the icing to become soggy or sticky.
Royal icing cookies are best enjoyed within 1-2 weeks of decorating for optimal freshness and taste. Enjoy them or share them with friends and family before they lose their quality.
The Magic of Decorated Cookies
Personalized decorated cookies carry a distinctive touch, crafted with love and care that store-bought options often lack. Their appeal lies not only in their taste but also in their ability to be customized to suit the unique preferences of the recipient. From their creative designs to their versatility for various occasions, decorated cookies offer an experience that extends far beyond a simple edible gift. They evoke memories, foster connections, and leave a lasting impression that embodies the essence of heartfelt gifting. In exploring the reasons why homemade decorated cookies make exceptional gifts, we uncover a delightful journey of creativity, customization, and the meaningful gesture that makes them truly unforgettable.
Shop Ready To Bake Cookies
Now that you have the skills, you’ll need some cookies. With Collin Street Bakery’s new line of Ready to Bake Cookies you can savor the flavor of made-from-scratch cookies without ever having to plug in your mixer. Made with simple, quality ingredients, our ready-to-bake cookie dough allows you to enjoy the taste of Texas's most iconic cookies whenever you desire. Shop all our varieties today!
Leave a comment
This site is protected by hCaptcha and the hCaptcha Privacy Policy and Terms of Service apply.